Fashion Ecommerce Product Photography Shot List (2026 PDP Guide) Fashion Ecommerce Product Photography Shot List (2026 PDP Guide)

Fashion Ecommerce Product Photography Shot List (2026 PDP Guide)

Stylitics Marketing Team

The Stylitics Marketing Team explores the intersection of AI, retail, and shopper experience, sharing strategies and insights that shape the future of product discovery and visual merchandising.

Your best sellers probably have eight images each, with a front, a back, a detailed close-up, two on-model shots and a lifestyle scene. Open a product from the back half of the catalog, or any colorway that isn’t the hero color, and you’ll often find one flat lay and nothing else.

Shoppers notice the gap, because most of them go straight to the images and try to answer questions the images never cover. How does the back look? How will it fit a body like mine? What is the fabric really like? When the photos can’t answer, shoppers guess, leave, or buy and send it back.

This shot list is built for the whole catalog rather than a single shoot. You’ll get every core PDP shot and the question it answers, the extra shots each category needs, and a way to decide which shots to capture on set and which to generate from images you already have.

Key Takeaways:

  • 56% of shoppers explore a product page’s images before anything else, so every missing shot is a question the page can’t answer (Baymard Institute).
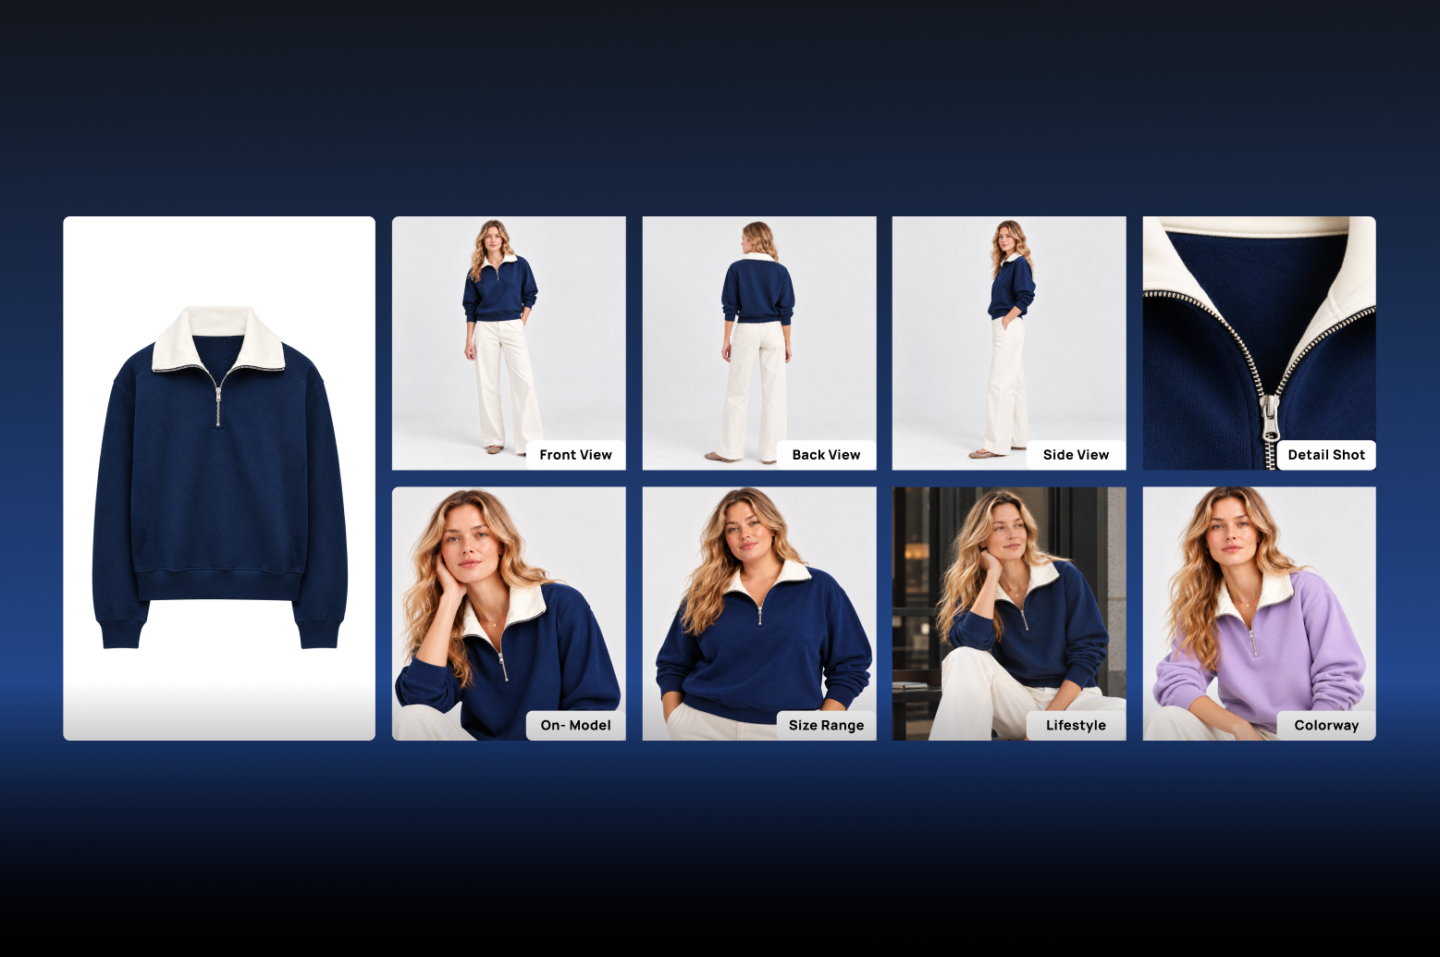
  • Plan one core set of shots for every SKU and every colorway, covering front, back, side, detail, on-model and in-context views.
  • Capture hero shots on set and generate the long tail from consistent front and back source images, with fashion-trained human QC.

Why does the shot list decide conversion and returns?

An estimated 19.3% of online sales were returned in 2025 (NRF and Happy Returns, 2025). Many of those returns start on the product page, when the images leave a question unanswered and the shopper fills the gap with a guess. A shot list is how you make sure every product answers the questions shoppers actually ask.

Images are where that decision happens, and in Baymard Institute’s product page testing, 56% of participants began by exploring the product images before reading the title or description (Baymard Institute). In apparel the gap is wide, and Baymard’s 2025 research found 90% of apparel sites fail to let users properly assess a product’s appearance, size or fit (Baymard Institute, 2025).

So treat the shot list as a coverage standard every product has to meet, rather than a creative wish list for the next launch. Start from the questions a shopper would ask in a store, like what the back looks like, how it fits and what the fabric feels like, then work back to the shots that answer them. The returns case for doing this is covered in why AI-generated imagery reduces returns.

What shots does every product page need?

76% of shoppers in a Stylitics survey said model photos were the most useful format for a purchase decision (Stylitics, 2025). On-model imagery anchors the set, but it can’t do the whole job alone. Every product page needs the eight core shots below, and each one answers a different question a shopper would otherwise ask a sales associate.

Front view

The front view is the hero image and the first thing a shopper sees in search results, category grids and the product page. It sets silhouette, color and overall design. Shoot it straight on, with the same crop and background across the category, so the grid looks consistent and shoppers can compare products at a glance.

Back view

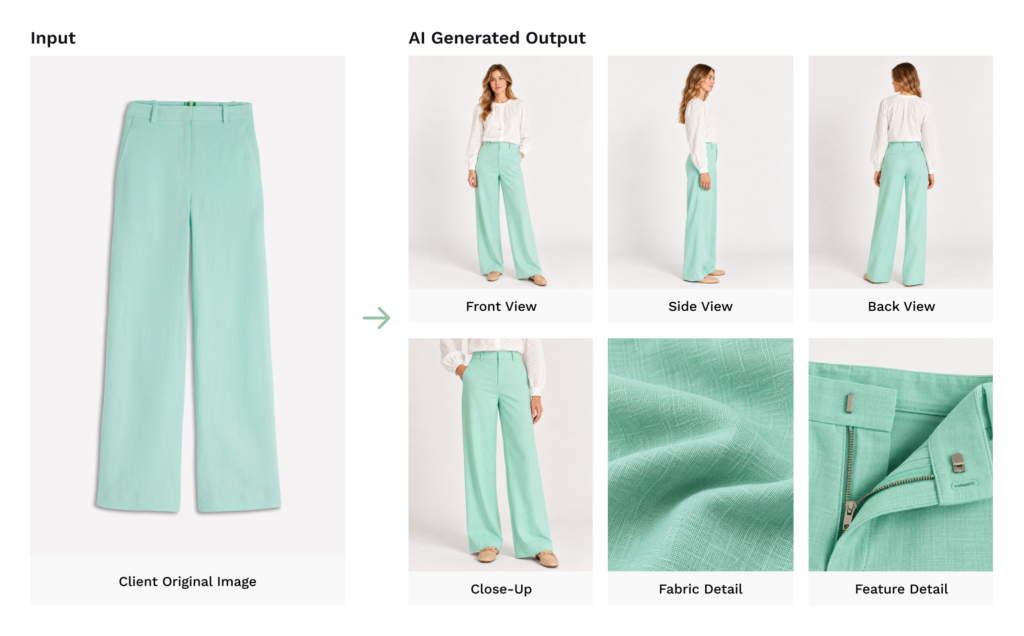
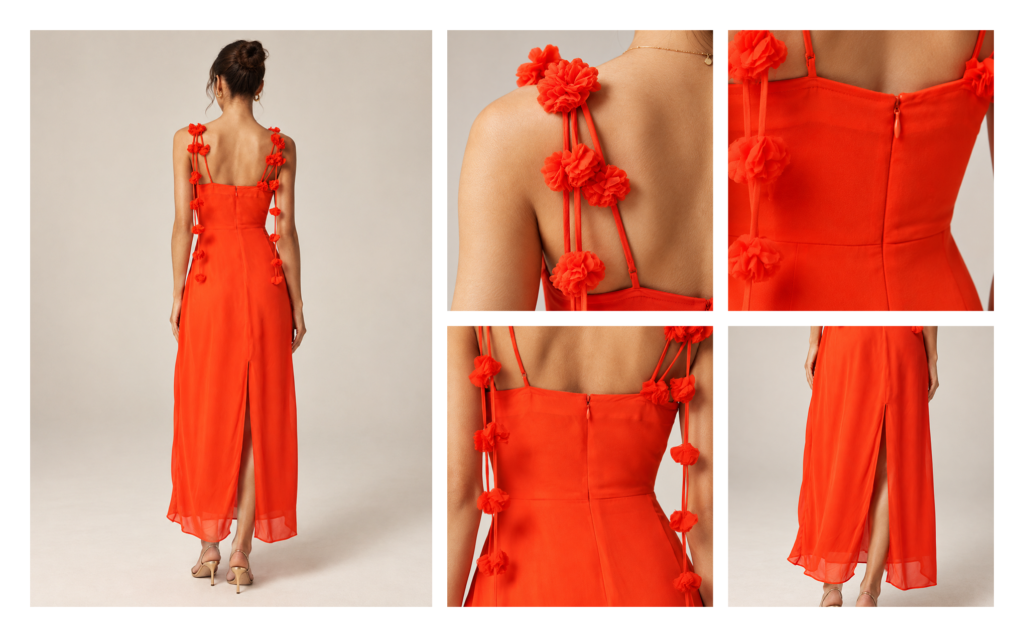
The back view answers what the front can’t, including closures, rear construction, pockets, straps and how the garment sits across the shoulders. It matters most for dresses, swimwear, outerwear and denim. Missing back views are one of the most common gaps on long-tail products, and one of the easiest to fill when you already have front and back source images.

Side view

A side or profile view shows proportion, depth and fit from one more angle. It’s essential for footwear, outerwear, voluminous dresses and anything whose silhouette changes when you turn it. On apparel it also helps shoppers judge length and how fitted the garment really is.

Detail shots

Detail shots are where quality gets sold, so show fabric texture, stitching, buttons, hardware, embellishment, pockets and logos up close, at a resolution that still holds when a shopper zooms in. Pick the two or three details that answer the question shoppers ask most about that specific product, rather than shooting every seam.

Crop and framing

Framing decides how much of the product and the body a shopper sees. Full-length, three-quarter and waist-up crops each suit different products, and a top may need both waist-up and full-length to show how it pairs with bottoms. Set a framing standard per category and apply it to every product so the grid stays consistent.

On-model and in-scale shots

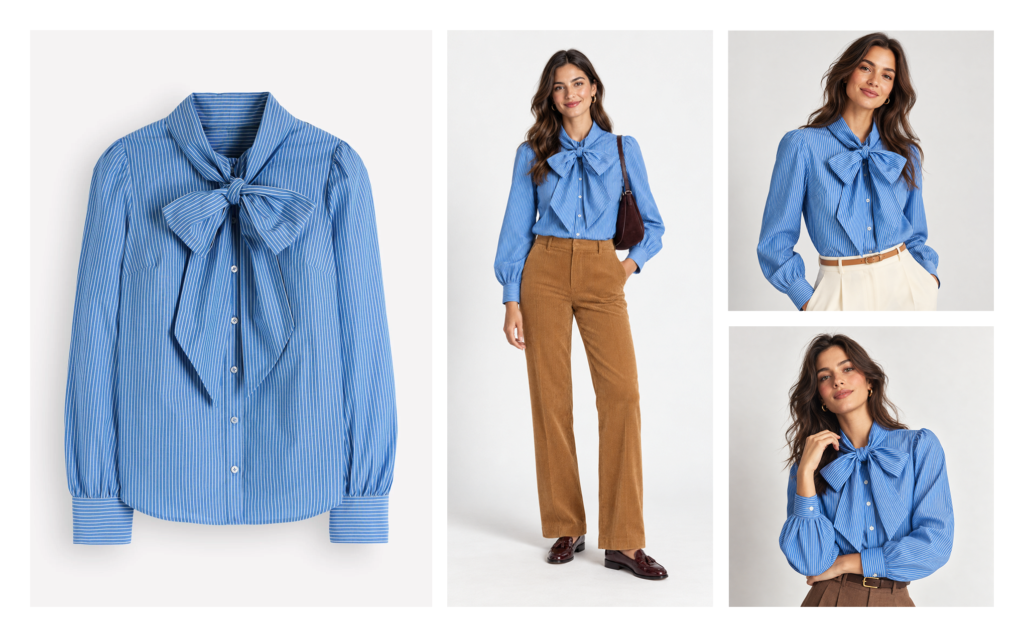
A body gives scale and fit in a way a flat lay can’t. Shoppers use on-model images to judge length, drape and how closely a garment fits, so show the model’s height and the size they’re wearing, and offer more than one body type where you can. Turning an existing flat lay into on-model imagery is now a practical way to cover products that never went to a studio.

Lifestyle and in-context shots

Lifestyle shots show the product in use, whether that’s a jacket on a city street or a swimsuit by the water. They build desire and suggest an occasion. Treat them as additions to the information shots and never as replacements, since a beautiful scene that hides the fit still leaves the shopper guessing. Model-in-setting imagery can place the same product in several scenes without a location shoot.

Colorway coverage

Every colorway needs the same core set as the hero color. In practice the hero color often gets five or more images while the other colors get one. Shoppers who prefer the navy version shouldn’t have to judge it from a thumbnail, and AI colorway generation can extend a full set from one reference color without a reshoot.

The shot list at a glance

ShotShopper question it answersPriorityCapture or generate
Front viewWhat does it look like?RequiredCapture on set for hero SKUs, generate for the long tail
Back viewWhat’s on the back?RequiredGenerate from front and back source images
Side viewHow deep, long or fitted is it?Required for footwear and outerwearGenerate from source images
Detail shotsIs the quality there?RequiredCapture for hero SKUs, generate from high-resolution sources
On-modelHow will it fit on a person?Required for apparelGenerate from a flat lay or ghost mannequin
Size-range modelsWill it work on a body like mine?RecommendedGenerate from the on-model set
LifestyleWhere would I wear it?RecommendedCapture for campaigns, generate for the catalog
Colorway setDoes this color look as good?RequiredGenerate from one reference colorway

How should the shot list change by category?

The eight core shots hold in every category, but each category adds shots for whatever shoppers can’t judge from a front view. Start from the core set, then layer on the extras below for each part of your assortment, keeping in mind that every shot you add is another shot you have to produce for every SKU.

Apparel

Apparel needs fit-focused shots, like a full-length on-model view and a closer crop at the waist, neckline or hem. Show the model’s size and height next to the images. Where your customers span a wide size range, show key styles on more than one body type with inclusive model imagery.

Footwear

Footwear needs more angles than any other category, so cover the front, both sides if they differ, the back, a three-quarter angle, a top-down view, the sole and an on-foot shot. Detail shots should show materials, hardware and sole construction. Shoes also sell better styled into a complete look, which is where outfitting for footwear brands picks up.

Swimwear

Back coverage matters more in swimming than almost anywhere else, so treat the back view as required rather than optional. Show on-model fit across the size range, since cut and coverage vary so much by body. Add one in-context shot by the water, and style pieces with cover-ups and sandals through outfitting for swim brands.

Accessories

Bags, jewelry and hats need in-scale shots on a person, because size is hard to read from the product alone. Add interior shots for bags, clasp and hardware close-ups, and a worn shot for jewelry so shoppers can judge proportion against a face, wrist or neckline.

Home

Home products need in-room scale above everything else, so show each piece in a styled room, add close-ups of material and finish, and include a dimensioned view where size drives the decision. Room scenes that combine several products also help with cross-selling for home brands.

Why most catalogs only finish the shot list for best sellers

71% of shoppers have made a return because a product didn’t match its online listing (Salsify, 2025). Yet in most catalogs the full shot list only reaches best sellers. Studio time and budget run out long before the long tail, so the products that most need help explaining themselves end up with the least imagery.

In the AI imagery programs Stylitics runs, the gap is almost never the quality of hero shots. It’s coverage. Best sellers get a full set, new colorways get one image, and the long tail sits on a single flat lay. The cause is bandwidth and budget rather than taste, since nobody on the creative team decided those products didn’t deserve a back view.

That changes once the missing shots can be generated from source images you already have. With consistent front and back photos per product, a platform can produce back views, detail shots, generative AI on-model imagery and colorway sets at catalog scale, with fashion-trained human QC checking each image. A global sportswear retailer with a 100,000-plus item catalog now produces 10,000 images a week this way, at 90% lower cost per image. See how AI Image Studio fills the gap.

How to build a shot list you can finish across the catalog

A shot list you can finish works like a production standard, with tiers, defined inputs and a decision on how each shot gets made. The five steps below turn the checklist above into something your team can apply to every SKU this season, starting with an honest count of what’s missing today.

StepActionOutput
1. Audit coverageCount images per product and per colorway, by categoryA list of products and the shots each one is missing
2. Tier the shotsMark each shot required or recommended for each categoryA shot standard per category
3. Fix source inputsStandardize front and back source photos for every productInputs a platform can reuse at scale
4. Decide capture or generateKeep hero and campaign shots on set, generate the restA production plan per tier
5. Set QA rulesDefine checks for color, construction, logos and fitAcceptance criteria for every image

Step 5 matters most once you start generating shots, because every generated image has to match the product exactly, down to the buttons. In a Stylitics survey of 411 shoppers, 71% couldn’t tell a generated image from a photo, but confidence dropped quickly when details looked wrong. Clear accuracy rules protect that trust. For the wider product page picture, see PDP optimization for fashion.

Close your imagery gaps

A complete shot list is a standard every product meets, not a privilege reserved for best sellers. Run the audit first and you’ll likely find the biggest upside sitting in the long tail and the non-hero colorways. Request a demo, bring a few products, and we’ll show you the missing shots generated from your own source images.

FAQs about ecommerce product photography shot lists